Here are a few of the failed attempts at 3D printing the tessellating 3D shapes. There were a few issues with the model itself and a few with the printer, but ultimately they were ironed out.
With the last house I was left with quite a lot of off-cuts. While designing this house I realised that this would be no different, however this time I was determined to make use of some of these off-cut in the model.
I played around with different way of connecting the off-cuts to form different shapes and patterns.
Here are the successful columns. I only required 6 of them, however I kept making columns of different shapes and styles until I was satisfied I had enough variety and originality.
Here is a time lapse video of making one of the columns (the first one in the image). This took about 15 minutes to create. Because of the amount of blue foam dust it kicks up when shaping the column I am holding a vacuum cleaner in my other hand to reduce the mess.
Here are some of my failed attempts at columns for the final model.
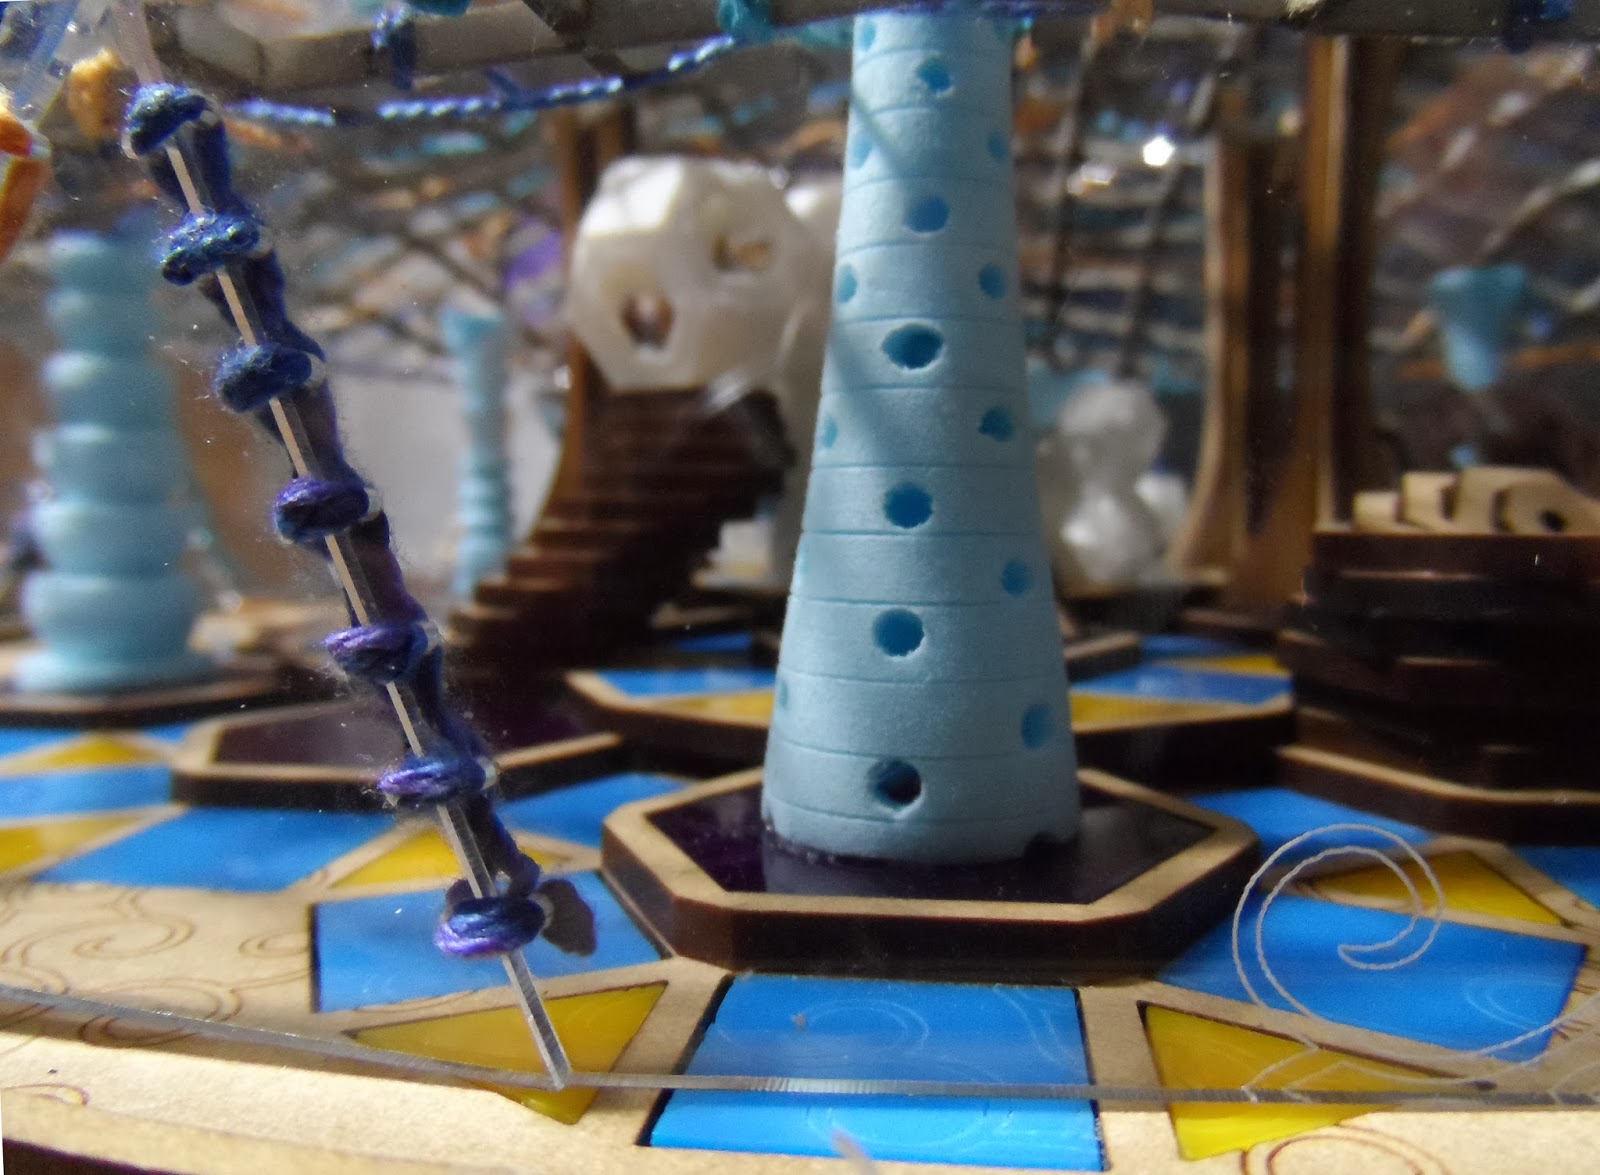
I attempted to hollow out the base of some of the columns to allow light up into the centre, then I punched some holes to allow the light to spill out. These experiments were largely unsuccessful as the more I removed from the column, the less structurally sound it became. These represent the columns that broke while making them.
Using 123D Make I made a lofted surface that would act as the forest canopy within the model.
I laser cut the cardboard for the elements and was left with one of the more difficult to assemble puzzles that I have come across. Each component is supposed to be etched with a specific letter and number the designates where it fits, however they were so small that they were impossible to read and assembly required comparing each piece to the original PDF plans. Eventually everything came together though.
I did the CREATE run arduino workshop, and although it was really good and I learned quite a few things, I don't think I'll be integrating it into this model as some of the things are quite complicated. I am however planning on using some basic LED lights in this model.
I was trying to think of other shapes which I could lathe. I have a few turned wooden bowls and thought it would be interesting if I could make something similar. The cup was slightly revealing about the behaviour of the blue foam as the size of the object changed the way it behaved on the lathe. The cup is about 15cm tall and because of the extra weight it wobbled more on the lathe and was difficult to get an accurate shape. For some reason the foam flaked and chipped more (you can see a large gouge on the lip of the cup) at the larger size. There was also the issue that because of the heavier weight the foam didn't stick to the bamboo skewer that ran through the middle, and after about 15 minutes of the lathe the skewer was so loose that the foam no longer turned with the lathe.
Here are 20 trials that I did turning blue foam. They are from both the Lego prototype and the 6mm MDF version. The MDF lathe was far more stable and had better results. By far the best tool for subtracting the foam was sandpaper, starting at a coarser grade until the basic shape was created, then smoothing and adding detail with the finer grain paper. I also uses a set of files to add the more intricate detail which could not be achieved with sandpaper.
I also did a number of trials, one with balsa, and another where I uses coloured pencils to add colour to the foam. The balsa was by far an easier material to work with, as it did not tear or flake or melt like the foam did in certain circumstances, but with enough practice there were a number of different shapes and patterns I was able to make from foam.
After the difficulty I had with the blue foam in the last project, I decided to try something a bit different. In the absence of an accessible CNC router I decided to try my hand at building my own lathe so I could turn perfectly cylindrical blue foam columns.
I'd never used a lather before, and wasn't sure if ti would work with blue foam, so I decided to prototype it with Lego and see what sort of effects I could achieve without having to spend time and money building something that might not work.
I was actually kind of surprised by the results. I was skeptical that the Lego would hold together under the speed of the Dremel, and also that it would be stable enough to get accurate shapes, but it performed well in both areas. If the Dremel was set too high then there were some issues (check out 1:16 in the video), but at this speed the friction between the cutting tool and the foam caused it to melt slightly and change colour, so even if structural integrity was not a concern, having the Dremel set to 2-3 gave better results than 6-8 anyway.
I reinforced the part which fell apart in the first attempt and was able to make a few more cylinder.
There were a number of other kinks that I was glad I worked out in the prototype stage as well. The method of attaching the foam to the lathe was an issue as if the two ends were not aligned or slightly loose then you would get an oval cross section rather than a circular one.
There was also an issue of having the pins I was using to hold the foam onto the lathe coming lose. I solved this initially with a bit of tape, but after a while decided that if I ran a length of metal though the centre of the foam I could solve both problems. Unfortunately I could find a piece of metal of the right size and length, so instead used bamboo skewers which worked quite nicely.
I also discovered that spinning causes friction, friction causes heat, heat causes melting. Lego had a slightly higher melting point point than I thought, and after going through several of these pieces I decided to deign and make a MDF lathe.
Here is my first attempt at making the dome. To ensure it was feasible I used cardboard and then hand stitched the pieces together with a needle and thread. It all came together nicely, and formed the shape that I wanted and had the sort of effect of a hand stitched diamond, which I was sort of going for as it embodied inherent ideas of high fashion, however the stitching took me three days to complete (about 15 hours in total). I decided that despite this, I liked the effect enough to do it for the final model.